Seasonal Guide: Photographing Autumn Colours in British Woodlands
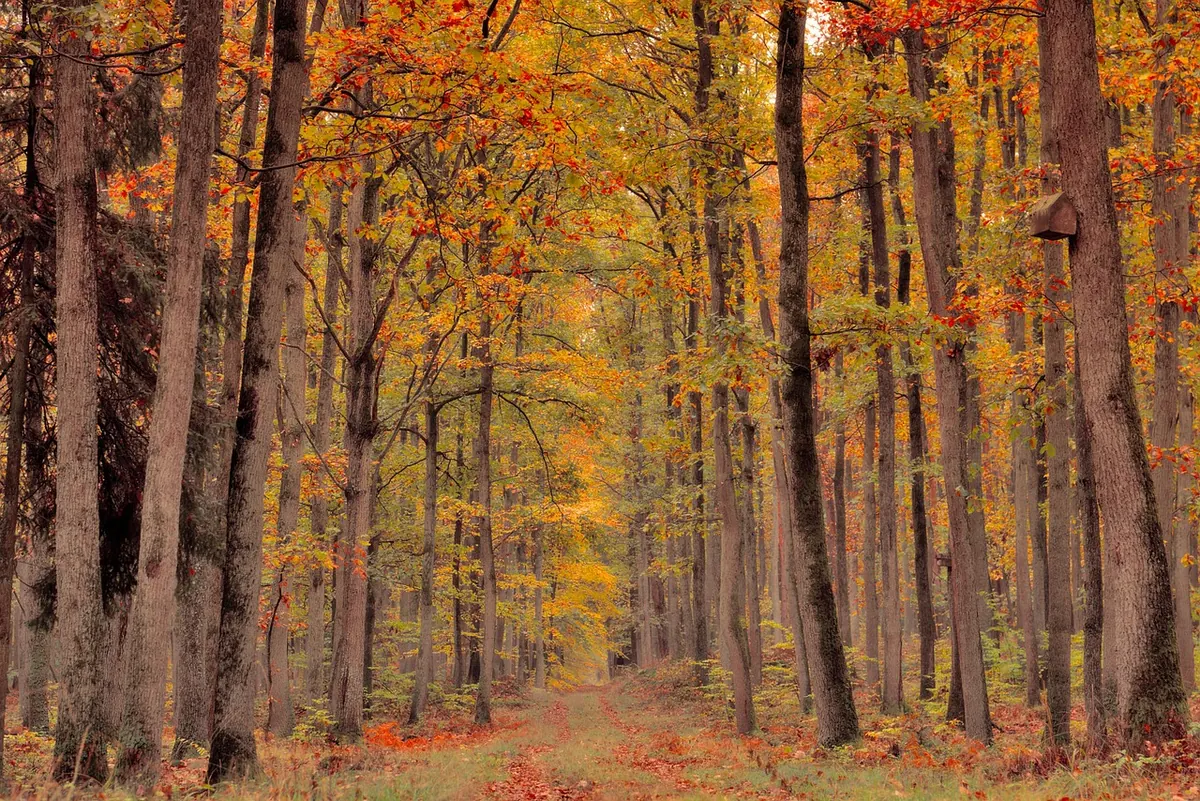
Autumn in a British wood can turn in the space of a week. One weekend the beeches are green; the next they are copper, and a gale has stripped half of them. This is a season that rewards preparation more than luck. The good news is that you do not need an expensive kit or a trip to a famous forest. You need to know when to go, what to do when the weather turns, and where to stand. This guide covers the decisions that make the difference: timing, light, camera settings and composition, plus a few habits that will sharpen your nature and travel portfolio.
Read the Season, Not the Calendar
Peak colour is not a single date. It rolls south and downslope through October and into November, and it arrives at different times for different trees. Learn a handful of species and you can predict a wood's best fortnight.
- Birch and field maple turn first, often from late September, with clean golds that suit backlighting.
- Beech is the main event for many photographers: copper-orange leaves that hold on the tree well into winter, especially on chalk soils.
- Ash goes yellow early and drops quickly, so work fast when it turns.
- Oak is late, shifting to bronze and russet through November and holding longer than most.
- Larch, our deciduous conifer, turns gold before its needles fall, and glowing larch against dark pines is one of the season's best combinations.
Elevation matters as much as latitude. Woodlands in the north and on high ground peak earlier, while sheltered southern valleys can lag by a fortnight. Watch your local woods rather than waiting for a national report, and check a few trees you pass regularly. When the first birch goes over, you have roughly two weeks.
Work the Weather
Bright sun is tempting and often disappointing. Overcast days are the reliable friend of colour photography: clouds act as a giant softbox, revealing saturated leaves without harsh shadows. Rain is better than most people think. Wet leaves deepen in tone, trunks go almost black, and the contrast between the two is what makes an autumn frame feel rich.
Mist is the prize. A calm morning after rain, when the air is still and the temperature has dropped, often produces fog in valleys and along rivers. Fog separates the layers of a wood and gives depth, because each receding trunk is paler than the one in front. Set off early; mist usually burns off within an hour or two of sunrise.
Direct sun still has its uses. A low autumn sun from behind brings out individual leaves and turns bracken and larch to gold. Shield the front element with a lens hood or your hand to keep flare under control, and expose for the leaves rather than the whole scene.
Camera Settings That Hold Up
Autumn scenes mix bright sky, dark trunks and mid-tone leaves, so exposure is the first problem. Start in aperture priority and check the histogram after each change.
- Aperture: f/8–f/11 for a whole tree or a woodland view; f/4–f/5.6 when you want one trunk or branch sharp against soft colour behind; f/2.8–f/5.6 for a single leaf close up.
- Shutter speed: at least 1/60 sec for a steady scene, faster if branches are moving. Deliberate motion blur of leaves in wind suits 1/8–1/30 sec on a tripod.
- ISO: base sensitivity where possible, 400–800 when the wind or the light leaves no choice. A little noise is better than a soft frame.
- White balance: cameras tend to neutralise warm tones. Daylight or cloudy presets keep the gold and copper that made you stop.
- Format: shoot raw. Autumn colour responds well to small adjustments in editing.
Exposure and support
Backlit leaves against a dark wood, or bright skies through a canopy, will fool any meter. Meter for the brightest foliage, then review the histogram and adjust in thirds of a stop. Bracketing is cheap insurance and takes seconds. A polariser is the one filter worth carrying: it cuts glare from wet leaves and deepens colour, though on very wide lenses it can leave one half of a blue sky darker than the other, so check the edges of the frame. A tripod lets you stop down and keep ISO low, and autumn days are short, so you will lean on it more than you expect.
Composition in a Wood
Woods are visually busy, so decide what the photograph is about before you raise the camera. A single ancient oak, a path under beech, a leaf caught in a stream. If you cannot say what it is, you have not found the frame yet.
Depth comes from layers. Put something close to the lens as a foreground: leaf litter, a fern, a low branch. Then a middle distance of trunks, then a soft canopy or lit background. Get low or look slightly upward; both angles put the viewer inside the wood rather than in front of it.
Use a path, stream or fence as a leading line, and let it run towards a corner rather than the centre. Vertical frames suit tall trunks and canopy shots; horizontal frames suit woodland floors and wider vistas. Do not forget the ground itself. A carpet of fallen leaves with one fresh arrival in the middle is often a stronger image than an ambitious wide shot. Look for colour contrast, too: copper beech against silver birch trunks, or russet bracken against the green of conifers. Finally, if a branch pokes into the corner of your frame, move your feet. Cropping later rarely fixes a messy edge.
A simple working sequence
- Walk the wood without a camera first, noting where the colour and the light are best.
- Return at the right hour, and work one location slowly before moving on.
- Start wide to set the scene, then move in for details: bark, leaves, fungi, reflections.
- Change your height for each idea. Kneel for the floor, stand for the canopy.
- Review on the back of the camera for exposure only, then keep moving.
Editing Without Overcooking
Autumn colour is easy to ruin in editing. Start with white balance to restore the warmth you saw, then add gentle contrast. Lift the shadows a little to open up dark trunks, and check that no colour channel has clipped: leaves that have lost their detail look plastic. If the sky has blown out, that is often fine; a bright patch above a dark canopy reads as light rather than error. Keep saturation modest and use local adjustments, such as a graduated filter or a brush, rather than pushing the whole image. Sharpen lightly, because fine leaf detail turns brittle fast. For mist images, a little dehaze or clarity can separate the layers, but use both sparingly.
In the Field: Habits That Make a Difference
Take a handful of spare batteries and memory cards, two lens cloths for wet days, and waterproof trousers. Because the clocks change during the season, plan your visits around the light rather than the clock, and tell someone where you are going if you are heading out at dawn.
Work a location more than once. Return to the same oak through the season, and you will end up with a set of images that says something about change rather than a collection of pleasant postcards. That coherence is what lifts a portfolio.
Finally, look after the places that give you these photographs. Stay on paths where they exist, avoid trampling moss and young trees for a better angle, and leave fungi and fallen leaves where they are. Carry out what you carry in, and keep an eye out for ticks afterwards; a quick check at home is a sensible habit.
Photo: Peggychoucair / Pixabay